
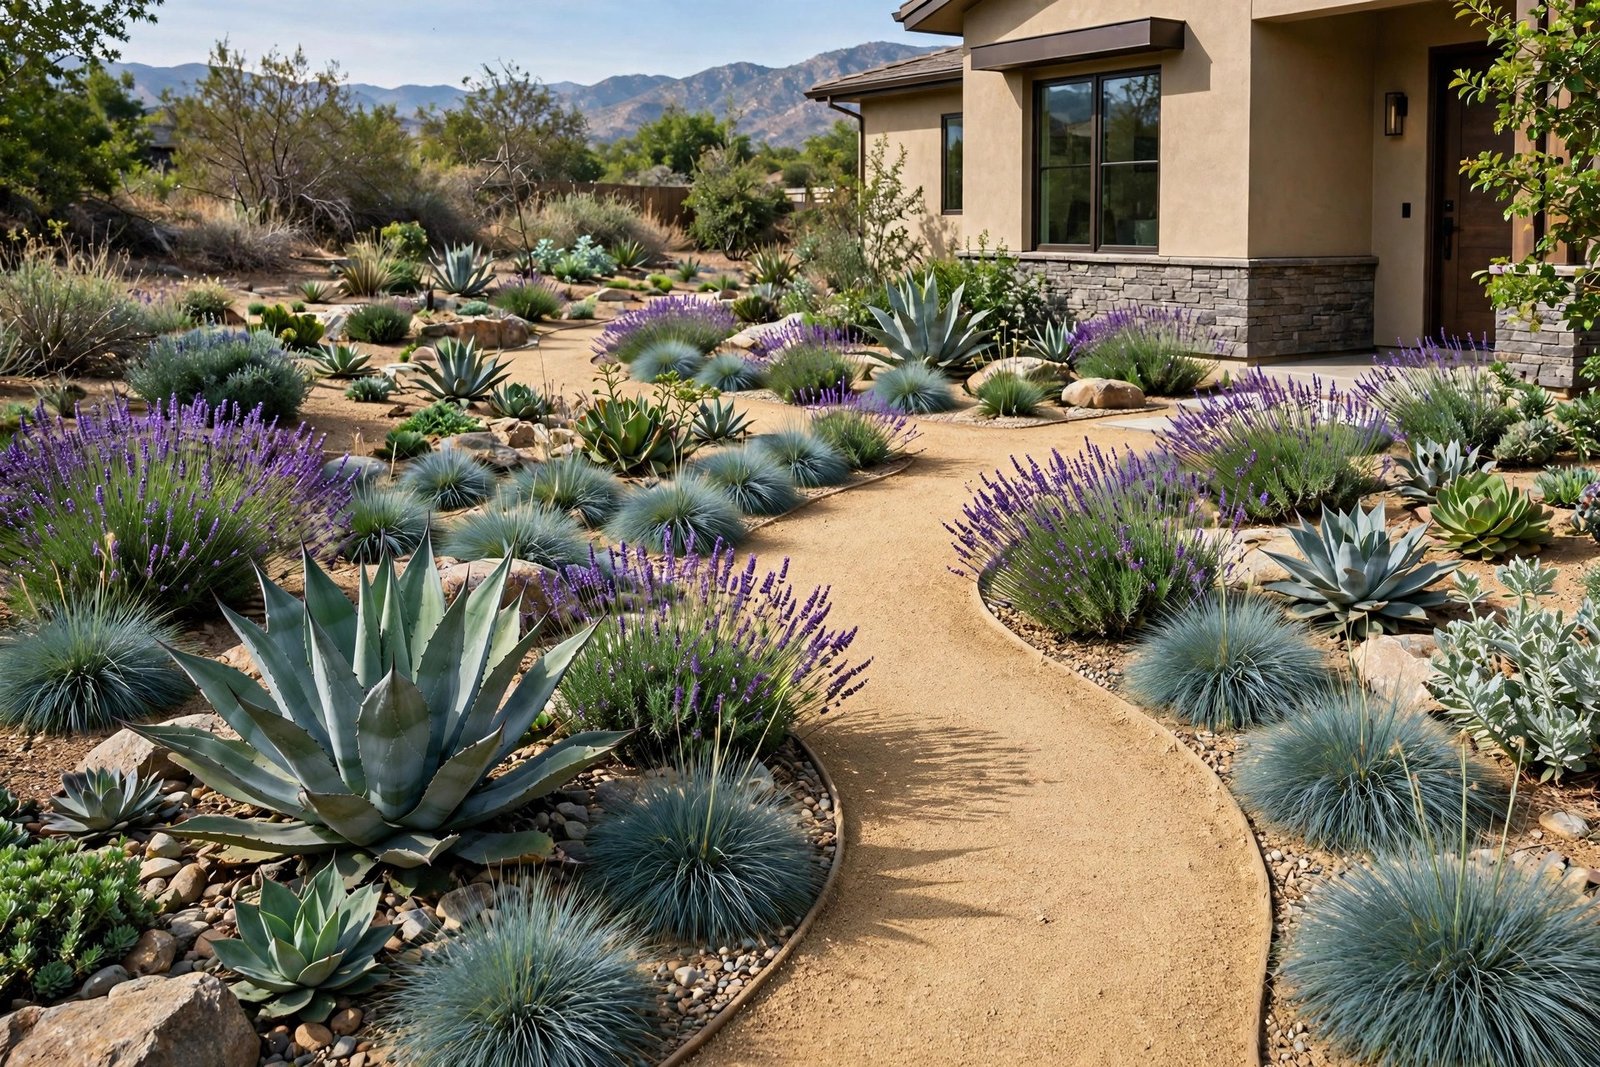
Xeriscaping has a PR problem: most people hear the word and picture a yard of gravel and cacti — a moonscape where grass goes to die. The reality is the opposite. Done right, xeriscaping creates gardens that are lusher, more colorful, and more alive than the lawns they replace, while using a fraction of the water.
This guide explains what xeriscaping actually is, the seven principles behind it, what it costs, which plants to choose, and exactly how to start — whether you are converting a whole yard or just one bed.
What Xeriscaping Really Means
Xeriscaping (from the Greek xeros, meaning dry) is a landscaping philosophy built around water efficiency — not the elimination of plants, but the intelligent matching of plants to available water. It was developed in Colorado in the early 1980s during a severe drought, and it has since become the standard approach in water-scarce regions worldwide.
The key insight: a xeriscape is not a specific look. It can be a cottage garden of lavender and salvia, a native wildflower meadow, a Mediterranean courtyard of olive and rosemary, or a modern architectural planting of agaves and grasses. What unites them is design that works with water reality instead of against it. A well-designed xeriscape uses 50–75% less water than a conventional landscape — and looks better doing it. For a gentler entry point, these low-maintenance landscaping ideas for beginners overlap heavily with xeriscape principles.
The 7 Principles of Xeriscaping
1. Plan and design. Map your yard: sun exposure, soil type, slopes, existing plants worth keeping. Design on paper before buying a single plant — this step saves more money than any other. 2. Improve the soil. Contrary to myth, xeriscaping does not mean ignoring soil; compost-amended soil holds water better, meaning less irrigation for everything.
3. Create hydrozones. Group plants by water need — thirsty plants together near the house, drought-tolerant ones further out. This single principle eliminates the most common watering waste. 4. Choose appropriate plants. Natives and climate-adapted plants are the backbone; they evolved for your conditions. 5. Mulch deeply. 3–4 inches of mulch cuts evaporation dramatically and suppresses weeds.
6. Irrigate efficiently. Drip systems and smart controllers deliver water to roots, not air. 7. Maintain appropriately. Xeriscapes need less maintenance, not none — seasonal pruning, mulch refreshes, and irrigation checks keep the system working. The EPA’s WaterSense program offers detailed guides on each principle with regional plant lists.
What It Costs (and What It Saves)
DIY conversion of an average yard runs $1,500–$4,000 in plants, mulch, and irrigation parts; professional installation runs $5,000–$15,000+ depending on size and hardscape. That sounds steep until you run the numbers: water bill savings of 50–75%, eliminated mowing and fertilizing costs, and — in many Western states — turf-replacement rebates of $2–$3 per square foot that can cover a large share of the project.
Phase the work to spread costs: convert one zone per season, starting with the most visible or most water-hungry area. Buy small plants (1-gallon, not 5-gallon) — they establish faster, catch up within two years, and cost a third as much. And propagate: many xeriscape stars (salvia, lavender, succulents) root easily from cuttings, turning one plant into dozens for free.
Start with one bed
You do not need to convert the whole yard at once. Pick one bed — ideally a hot, dry, difficult spot where the lawn already struggles — and xeriscape just that. A single successful bed teaches you the plants, the watering rhythms, and the aesthetic, and it becomes the proof of concept that motivates the rest. Small starts beat grand plans that never happen. Photograph the bed through the seasons; the before-and-after story is satisfying and useful if you later apply for turf-replacement rebates, which often require documentation.
Best Plants for a Xeriscape Garden
Build around reliable performers. Structural anchors: agave, yucca, manzanita, olive, desert willow. Flowering workhorses: lavender, salvia (dozens of varieties), penstemon, coneflower, blanket flower, yarrow. Grasses: blue fescue, deer grass, Mexican feather grass — movement and texture with near-zero water needs once established.
Groundcovers: creeping thyme, sedum, dymondia — living mulch that suppresses weeds. For pollinators: native milkweed, bee balm, buckwheat — a xeriscape buzzing with bees and butterflies is the best advertisement for the concept. The National Wildlife Federation maintains native plant guides by region that make selection foolproof. Match plants to your specific zone and microclimate; a plant perfect for Arizona may drown in Seattle.
Design Tips That Make It Beautiful
The difference between a stunning xeriscape and a sad one is design, not plants. Repeat plants in drifts — five lavenders together read as intentional; one of everything reads as a collection. Vary heights and textures — spiky agave against soft grass, silver foliage against deep green. Use hardscape deliberately: boulders, decomposed granite paths, and dry creek beds give structure and make the planting sing.
Keep some lawn if you want it — xeriscaping does not forbid grass, it just shrinks it to where it is actually used (a play area, a sitting spot). A small, well-kept lawn surrounded by rich planting looks intentional; a vast struggling lawn looks neglected. And remember the yard is for living: integrate seating, paths, and gathering spaces so the water-wise garden is also the garden you use — a xeriscape can absolutely make your backyard fun for summer parties, and guests will never guess it sips water. Design it well and the xeriscape becomes the neighborhood’s favorite yard.
Conclusion
Xeriscaping is not gravel and cactus — it is the art of gorgeous gardens that sip water instead of guzzling it. Start with the seven principles, convert one bed to learn the ropes, choose climate-adapted plants in drifts, and phase the project as budget allows. Your water bill will drop, your weekends will free up, and your yard will become the one neighbors stop to photograph. The lawn era is ending; the xeriscape era looks better anyway.
Frequently Asked Questions
Does xeriscaping mean no grass at all?
No — it means using grass intentionally rather than by default. Keep lawn where it serves a purpose (play areas, gathering spots) and replace the rest with water-wise planting. A small healthy lawn surrounded by rich xeriscape beds looks far better than wall-to-wall struggling turf.
How much water does xeriscaping actually save?
Typically 50–75% less than a conventional landscape, with the biggest savings from lawn removal. Once established (usually 1–2 years), many xeriscape plants need little to no supplemental water beyond rainfall in suitable climates.
Is xeriscaping expensive to install?
DIY conversion runs $1,500–$4,000 for an average yard; professional installation $5,000–$15,000+. Turf-replacement rebates in many states cover a significant portion. Phasing the project and buying small plants keeps costs manageable.
Will a xeriscape look dead in winter?
Not if designed well — evergreen structural plants (manzanita, agave, ornamental grasses) provide year-round form, and many xeriscape plants have attractive seed heads and bark. Good design considers all four seasons, not just summer bloom.
Can I xeriscape in a wet climate?
Yes — the principles (right plant, hydrozoning, mulch, efficient irrigation) apply everywhere, though plant selection shifts to species adapted to your rainfall. In wet climates, xeriscaping is more about low-maintenance, climate-adapted planting than extreme water savings.