
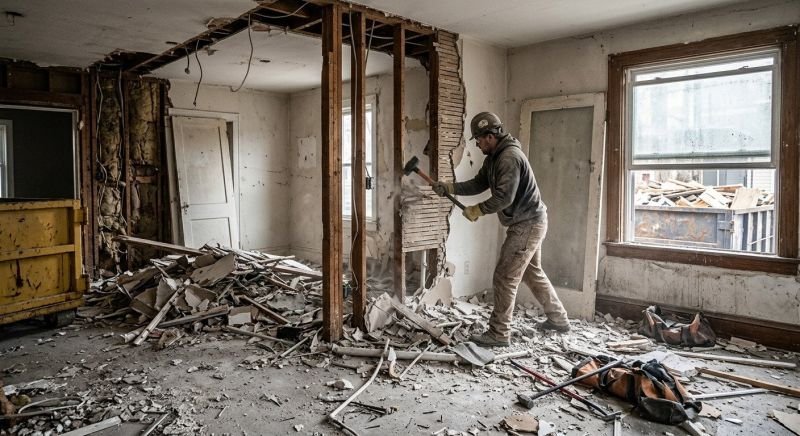
What Should I Know Before Knocking Down a Wall in My House?
Open concept. It’s the dream — kitchen flowing into living room, light everywhere, space to breathe. And knocking down a wall looks so easy on TV: a sledgehammer, some dust, done by commercial break. Reality check: if you’re asking what should I know before knocking down a wall in my house, the answer starts with a warning — the wrong wall, removed the wrong way, can compromise your home’s structure, and the surprises inside walls (wiring, plumbing, asbestos) turn weekend projects into five-figure problems.
The #1 Question: Is It Load-Bearing?
This is the question everything hinges on — literally. A load-bearing wall supports weight from above (upper floors, roof). Remove it without proper support and things sag, crack, or worse.
Clues a wall might be load-bearing:
- It runs perpendicular to the floor joists above (joists rest on it)
- It’s positioned near the center of the house
- It’s directly below another wall upstairs or below a beam
- It’s an exterior wall (almost always load-bearing)
- The wall is thicker than interior partitions (masonry, double-stud)
Clues it’s probably not: runs parallel to joists, clearly added later, thin single-stud partition with no structure above.
But clues aren’t confirmation. Before touching anything structural, get a structural engineer ($300–$600 for an assessment) or at minimum an experienced contractor to verify. This is not the place for YouTube confidence. If it is load-bearing, you’ll need a properly sized beam (LVL or steel) with permits and inspections — very doable, but it’s a $2,000–$10,000+ project, not a sledgehammer afternoon.
What Should I Know Before Knocking Down A Wall In My House?
Walls are full of surprises. Before demolition, investigate:
- Electrical wiring. Outlets and switches mean wires. You’ll need an electrician to reroute or terminate circuits safely — and to confirm nothing’s live before you swing.
- Plumbing. Walls near bathrooms/kitchens may contain supply lines or drain stacks. Rerouting plumbing is expensive and definitely pro work.
- HVAC ducts and returns. That wall might be carrying your heating. Rerouting ductwork affects system balance.
- Gas lines. If you even suspect one, stop and call a professional immediately.
- Asbestos and lead. Homes built before 1980 may have asbestos in joint compound, insulation, or flooring; pre-1978 homes likely have lead paint. Test before disturbing ($25–$50 per sample kit, or pro testing). Disturbing asbestos without abatement is dangerous and illegal in most jurisdictions.
Cut small inspection holes first and look with a flashlight and phone camera. What you find determines the project.
Permits: Yes, You Probably Need One
Most jurisdictions require permits for wall removal — especially load-bearing walls, but often for any structural modification. Unpermitted work creates problems: failed home inspections when you sell, insurance claim denials if something goes wrong, and stop-work orders with fines. The permit process also gets you an inspector’s eyes on the work, which is free quality assurance. Call your local building department and ask — it takes ten minutes and removes all doubt. The National Association of Home Builders has resources on working with local code requirements.
The Real Cost Breakdown
- Non-load-bearing wall, DIY: $500–$2,000 (dumpster rental, drywall repair, flooring patch, paint, electrical rerouting by an electrician)
- Non-load-bearing, pro: $1,500–$4,000
- Load-bearing with beam, pro: $4,000–$15,000+ depending on span, beam type, and what’s inside the wall
- Structural engineer assessment: $300–$600
- Asbestos testing/abatement: $25–$50 testing; $1,500–$30,000+ abatement if present (the wildcard)
The “invisible” costs catch people: patching flooring where the wall stood (good luck matching 20-year-old hardwood), repairing ceilings, repainting entire rooms for color match, and living in construction dust for weeks.
If You DIY the (Non-Structural) Demolition
- Confirm non-load-bearing with a professional first. Seriously.
- Get permits if required.
- Test for asbestos/lead if the home is old enough.
- Shut off electrical circuits in the wall; verify dead.
- Protect everything: seal the work area with plastic sheeting, cover HVAC vents, wear P100 respirator + eye protection + gloves.
- Remove trim and cut drywall into manageable sections (less dust than smashing).
- Pull studs, clean up nails, haul debris.
- Patch flooring, drywall the ceiling/floor edges, texture, paint.
What the Structural Engineer Actually Checks
That $300–$600 engineer visit — what are you paying for? The engineer verifies load paths: tracing weight from roof and upper floors down through walls to the foundation, confirming whether your wall carries any of it. They check joist direction and span (from basement/attic access), look for existing beams or headers indicating previous structural work, assess the foundation’s capacity for new point loads if a beam is needed, and specify the beam size, posts, and footings required. You receive a stamped letter or drawing — which your permit office wants and your contractor needs. It’s not just an opinion; it’s a legal document transferring structural liability to a licensed professional. That’s what the $400 buys: certainty, permits, and someone to sue if the math was wrong (it won’t be).
Living Through the Project: Survival Tips
Wall removal means dust — astonishing amounts of it, migrating everywhere despite your best barriers. Seal the work zone with plastic sheeting taped floor-to-ceiling (zipper-door kits, $30, are worth it), cover HVAC vents in the zone so dust doesn’t distribute through the whole house, and move valuables and fabrics out of adjacent rooms. Plan for noise (demo days are loud — warn neighbors), plan for the kitchen being unusable if it’s the work zone (set up a temporary kitchen elsewhere), and add 50% to whatever timeline the contractor quotes — structural work uncovers surprises on a schedule of its own. The disruption is real but temporary; the open space is permanent.
The Takeaway
What should you know before knocking down a wall in your house? Verify load-bearing status with a structural engineer, investigate what’s inside (wiring, plumbing, asbestos), get permits, budget for the invisible costs (flooring patches, dust, disruption), and never swing a sledgehammer at a wall containing a gas line or unverified structure.
Done right, removing a wall transforms a home. Done wrong, it’s the most expensive mistake in DIY. The $400 engineer visit is the cheapest insurance you’ll ever buy. Planning the new open space? Our room painting cost guide and flooring cost guide help budget the finish work.