
How to Tell If Chicken Is Fully Cooked Without a Thermometer
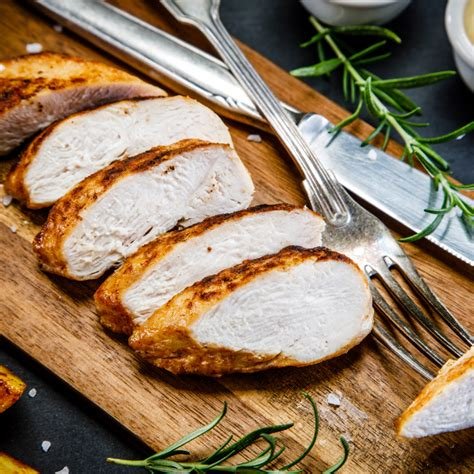
How Do I Tell If Chicken Is Fully Cooked Without a Thermometer?
You’re mid-recipe, the chicken’s on the stove, and there’s no meat thermometer in sight. How do I tell if chicken is fully cooked without a thermometer? I’ve been there — usually at someone else’s house, trying not to serve raw chicken to their dinner guests. Let me be straight with you first: a thermometer is the only truly reliable method, and they’re fifteen bucks. But when you don’t have one, there are time-tested cues that get you close. Here’s how to read them, and — just as important — their limits.
Why This Matters: The Safety Numbers
Chicken needs to reach 165°F internally to kill salmonella and campylobacter, the bacteria responsible for most poultry-related food poisoning. Unlike beef, there’s no safe “rare” for chicken — pink inside means keep cooking. Undercooked chicken isn’t a texture preference; it’s a health risk. Keep that 165°F target in mind as we go through the visual and tactile checks.
How Do I Tell If Chicken Is Fully Cooked Without a Thermometer? 5 Checks
1. Cut into the thickest part and look
The most reliable no-thermometer method: slice into the thickest part of the breast or thigh and look at the meat and juices. Fully cooked chicken is opaque white (breast) or tan/brownish (thigh) all the way through, with clear juices running out. Any pink, translucent, or jelly-like areas — or pinkish juices — mean it needs more time. Yes, you lose some juice by cutting. It’s worth it.
2. Check the juices
Pierce the thickest part with a fork or knife. If the juices run clear, that’s a good sign. Pink or reddish juices mean the chicken isn’t done. This works best on bone-in pieces where you can pierce near the bone — the slowest-cooking spot.
3. The touch and firmness test
Raw chicken feels soft and jelly-like; cooked chicken firms up. Press the meat with tongs or a finger (carefully — it’s hot). Fully cooked breast feels firm with a slight spring, similar to pressing the base of your thumb when you touch your thumb to your middle finger. This takes practice to calibrate, so use it alongside the visual checks, not alone.
4. Check the texture when cut
Cooked chicken fibers separate cleanly and look opaque. Undercooked chicken looks glossy, almost wet, and the fibers seem fused together. Thigh meat will look slightly darker and juicier than breast even when fully cooked — don’t mistake that for rawness.
5. Time and size as a rough guide
As a sanity check: boneless breasts (6–8 oz) need 6–8 minutes per side in a hot skillet, or 20–25 minutes at 425°F in the oven. Bone-in thighs need 35–45 minutes at 425°F. If your chicken has cooked far less than these times, it’s almost certainly not done regardless of how it looks outside.
The Limits of These Methods (Read This Part)
I’ll be honest: every method above has a failure mode. Color is the biggest trap — chicken can look done on the outside while raw near the bone, and conversely, fully cooked chicken can retain a pink tinge from myoglobin (especially in young birds or smoked chicken) that looks alarming but is harmless. The touch test requires experience to read accurately. And cutting every piece dries out the meat.
That’s why I keep coming back to this: buy the thermometer. An instant-read thermometer eliminates all guesswork, prevents both food poisoning and the dry, overcooked chicken that comes from cooking “just to be safe.” It’s the highest-ROI fifteen dollars in any kitchen. Until then, use the cut-and-look method — it’s the most trustworthy of the no-thermometer options.
Resting and Carryover
One more thing people miss: chicken keeps cooking after you take it off the heat. A large breast can rise another 5°F while resting. Rest your chicken 5 minutes before cutting — the juices redistribute (juicier meat) and the temperature evens out. If you’re grilling or roasting, you can pull poultry at 160°F and let carryover take it to 165°F.
For official food safety guidance, the US government’s FoodSafety.gov site has clear poultry temperature charts, and the foodborne illness article on Wikipedia explains why poultry standards are stricter than beef.
Cooking Chicken Right From the Start
The best way to avoid the is-it-done anxiety is cooking chicken properly in the first place. Even thickness is everything: pound chicken breasts to uniform thickness (or butterfly the thick end) so they cook evenly — a breast that’s 2 inches thick on one end and half an inch on the other cannot cook evenly no matter what you do. A few firm whacks with a mallet or heavy pan solves the most common cause of half-raw chicken.
Don’t crowd the pan. Chicken pieces need space; crowded chicken steams instead of sears, turning gray and rubbery while the center stays undercooked. Cook in batches if needed — it’s faster overall than one crowded, steamy batch. Let it rest 5 minutes before cutting, just like any meat. And when in doubt about storage, our guide on whether four-day-old leftovers are safe covers exactly how long cooked chicken keeps.
Brining is the other secret weapon: 30 minutes in salted water (or overnight for whole birds) seasons the meat deeply and gives you a much wider margin between juicy and dry. Even a quick 15-minute brine makes a noticeable difference. Between even thickness, proper heat, resting, and brining, you’ll rarely need to anxiously cut into chicken again — though keep cutting to check until that thermometer arrives.
A Final Word: Just Buy the Thermometer
I’ve given you every no-thermometer trick in the book, and they all work — but let me make the case one last time for the $15 instant-read thermometer. It ends the anxiety completely: no cutting, no guessing, no dry “just to be safe” chicken. You’ll use it for steaks, roasts, bread, and candy-making too — it’s the most versatile tool in the kitchen per dollar. Get one with a thin probe and a fast readout, keep it in the utensil drawer (not buried in a gadget graveyard), and use it every time. In a month you’ll wonder how you ever cooked without it. Consider this your sign.
The Takeaway
Cut into the thickest part: opaque meat and clear juices mean done; any pink means keep cooking. Combine that with firmness and sensible cooking times, and you’ll be safe without a thermometer. But seriously — buy the thermometer. Future you, serving perfectly juicy chicken with total confidence, says thanks.