
How Do I Install Peel-and-Stick Backsplash Tiles?
Real tile backsplashes require a wet saw, thinset, grout, and a full weekend. Peel-and-stick backsplash tiles require… an afternoon and a utility knife. If you’re asking how do I install peel-and-stick backsplash tiles, you’ll be pleasantly surprised: this is one of the easiest, most renter-friendly upgrades in home improvement, and modern versions look convincingly real.
How Do I Install Peel-And-Stick Backsplash Tiles?
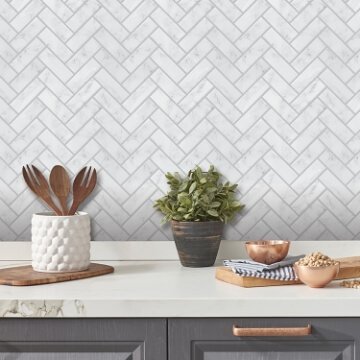
Honest assessment: the good ones are genuinely impressive now. Thicker vinyl and gel tiles with 3D texture mimic subway tile, mosaic, and even marble convincingly — especially from normal viewing distance. They’re heat-resistant enough for behind a stove (check the product’s rating — most handle up to 200°F+), water-resistant, and wipeable.
Limitations to know: they’re not as durable as real tile (expect 3–7 years in a kitchen, longer in a bathroom), very cheap thin versions look fake up close, and they don’t add home value like real tile. But for renters, budget refreshes, and laundry rooms, they’re outstanding. When you install peel-and-stick backsplash tiles, you’re buying 80% of the look for 10% of the cost and effort.
What You’ll Need
- Peel-and-stick tiles (measure your area + 10% extra; $5–$12/sq ft for quality tiles)
- Utility knife + straightedge (or sharp scissors for thinner tiles)
- Degreasing cleaner (TSP substitute or similar)
- Measuring tape and pencil
- Level or laser level
- Hair dryer (helps tiles conform around outlets and curves)
- Caulk for the countertop seam
Total cost for a typical 30 sq ft kitchen backsplash: $150–$360 in materials. Compare to $800–$2,000+ for real tile installed.
Step-by-Step Installation
- Prep the wall obsessively. Clean with degreaser, rinse, let dry completely. Peel-and-stick adhesive bonds to clean, smooth surfaces — grease and dust are the #1 cause of peeling edges. If the wall is textured, consider a thin skim of joint compound first (or accept slightly weaker adhesion).
- Plan your layout. Find the center of the backsplash area and work outward, so cut tiles land symmetrically at the edges. Dry-lay a row to check the pattern.
- Start from the bottom. Align the first tile’s bottom edge with the countertop (or a level line just above it). Press firmly from the center outward to avoid air bubbles.
- Work in rows, staggering seams like real tile for subway patterns. Overlap edges per the manufacturer’s design — most are made to interlock or butt seamlessly.
- Cut around outlets: turn off power, remove cover plates, measure and cut tile openings slightly smaller than the plate (the plate covers the edges). A hair dryer softens tiles for tricky curves.
- Roll or press firmly. Go over every tile with firm pressure (a wallpaper smoother or even a rolling pin works) to maximize adhesive contact.
- Caulk the bottom seam where backsplash meets countertop — this is the water entry point, and caulk protects it.
- Wait 24–48 hours before heavy cleaning or heat exposure, to let adhesive fully bond.
Pro Tips for a Real-Tile Look
- Buy thicker tiles. The 3D/gel tiles with real texture fool the eye; paper-thin flat ones don’t. Worth the extra $2–$3/sq ft.
- Mind the pattern repeat. Cheap tiles have obvious repeating patterns. Stagger and rotate to disguise it.
- Grout-look spacing matters. Tiles with printed “grout lines” look best when the lines align across tiles — take time with alignment.
- Caulk the edges where backsplash meets cabinets and walls for a finished, intentional look.
- Behind the stove: verify heat rating. Most quality tiles handle it; dollar-store versions may warp.
Removal (for Renters)
One of the best features: removal is clean. Warm each tile with a hair dryer to soften adhesive, peel slowly from a corner, and clean residue with warm soapy water or adhesive remover. No wall damage when done carefully — which is why landlords increasingly accept (or even suggest) these. Always check your lease first, though.
How Long Do They Really Last?
Manufacturer claims range from 5 years to “lifetime,” so here’s the honest field data: in a kitchen (heat, grease, steam), quality peel-and-stick tiles last 3–7 years before edges lift or patterns fade. In a bathroom (humidity but less heat), 5–10 years. In low-stress spots (laundry room, behind a bar cart), a decade or more. Longevity factors: surface prep quality (the #1 variable), tile thickness and adhesive quality, heat exposure (behind the stove ages fastest), and whether the bottom seam was caulked. The good news: when they do age, removal is clean and replacement is another cheap afternoon — unlike real tile, where you’re committed for decades.
Where to Buy (and What to Avoid)
Quality varies enormously. Reliable sources: established home-improvement retailers’ house brands, dedicated peel-and-stick companies with real reviews (thousands of them, with photos), and tile shops’ designer lines. Red flags: no-name bulk packs with zero reviews, suspiciously cheap per-square-foot pricing (under $3/sq ft is usually too thin to look real), and listings with only rendered product images (no real photos = hiding something). Order samples first — most good sellers offer them for a few dollars. Stick a sample on your wall for a week: check the look in your lighting, test adhesion, splash some water on it. A $5 sample prevents a $300 mistake.
Peel-and-Stick in Bathrooms: Special Notes
Bathrooms are actually a great peel-and-stick application — no stove heat, and modern vinyl tiles handle humidity well. The keys: ensure the wall is fully dry and the bathroom has working ventilation (an exhaust fan run during showers), caulk all edges and the bottom seam thoroughly, and avoid direct sustained water contact (they’re water-resistant, not waterproof — don’t tile inside the shower itself). Behind a vanity or as a full bathroom accent wall, they look fantastic and last years. Just keep that exhaust fan running — trapped humidity is the enemy of every adhesive.
Want a visual walkthrough before you start? This step-by-step peel-and-stick backsplash installation guide covers tools, layout, and trimming in detail.
The Takeaway
How do you install peel-and-stick backsplash tiles? Degrease and dry the wall thoroughly, plan layout from center outward, press tiles firmly row by row, cut carefully around outlets, caulk the counter seam, and let adhesive cure. An afternoon’s work, $150–$360, and a kitchen that looks updated.
It’s the perfect gateway DIY — low stakes, high reward, removable if you hate it. Kitchen refresh continuing? Our cheapest kitchen updates and best paint finish for kitchen walls complete the budget makeover.