
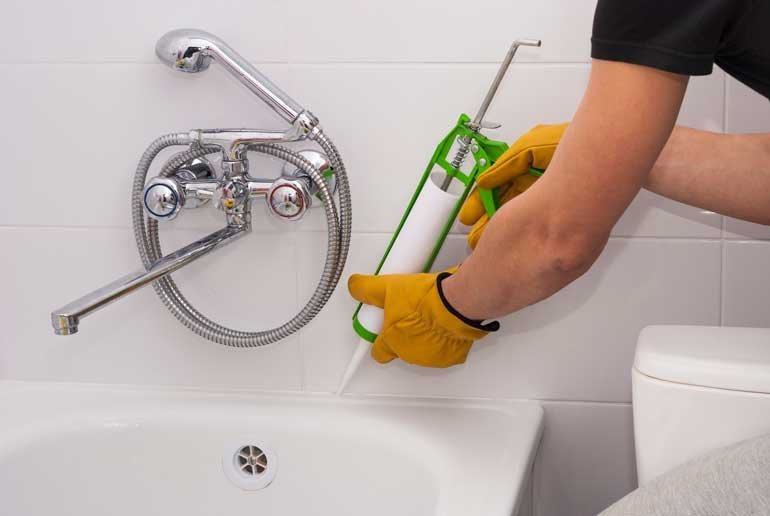
How Do I Caulk a Bathtub So It Actually Lasts?
I’ve caulked bathtubs that looked perfect for six months, then peeled, cracked, or grew mysterious black spots. And I’ve caulked tubs that looked perfect for six years. The difference wasn’t talent — it was about five small details that most DIY tutorials skip. If you’re asking how do I caulk a bathtub so it actually lasts, those details are everything.
How Do I Caulk A Bathtub So It Actually Lasts?
Caulk fails for predictable reasons, and every one is preventable:
- Wrong caulk type. Using painter’s acrylic caulk (or generic “kitchen and bath” caulk without silicone) in a wet area. It shrinks, cracks, and molds.
- Caulking over old caulk. New caulk doesn’t bond to old caulk. Ever. The #1 cause of premature failure.
- Wet or dirty surfaces. Caulk needs clean, dry surfaces to adhere. Soap scum is bond-killer #1.
- Too much caulk. A fat bead looks secure but flexes and cracks. Thin, properly tooled beads last longer.
- Caulking an empty tub. This is the secret one — see below.
What You Need
- 100% silicone caulk labeled for kitchen/bath (with mildew resistance). Not “siliconized” acrylic — pure silicone. It costs $8–$12 a tube and it’s the only thing that survives years of water exposure.
- Caulk gun (a decent one — cheap guns sputter and make smooth beads impossible)
- Plastic razor scraper or caulk removal tool
- Rubbing alcohol or mineral spirits + rags
- Painter’s tape
- Spray bottle with water + a drop of dish soap (for tooling silicone)
Step-by-Step: The Method That Lasts
1. Remove ALL the old caulk. Every trace. Use a plastic razor or caulk remover tool, then clean residue with mineral spirits. Run your finger along the joint — if you feel any old caulk, keep going. This step is tedious and it’s the most important one.
2. Clean and dry thoroughly. Scrub the joint with a bathroom cleaner to remove soap scum, rinse, then wipe with rubbing alcohol. Let it dry completely — ideally several hours, or overnight. Silicone won’t bond to damp surfaces.
3. Fill the tub with water. Here’s the detail most people miss: a full tub weighs hundreds of pounds and settles slightly, widening the tub-to-wall gap. If you caulk an empty tub, the first time someone takes a bath, the gap opens and cracks your fresh caulk. Fill it before you caulk, drain it 24 hours after. This single trick doubles caulk life.
4. Tape both sides of the joint. Run painter’s tape along the tub edge and the wall/tile edge, leaving a clean 1/4″ channel. This guarantees straight lines even if your hand isn’t steady.
5. Cut the nozzle small. Cut at 45 degrees, opening about 1/8″–3/16″. You can always apply more; you can’t apply less. A small bead is stronger than a fat one.
6. Apply in one continuous motion. Steady pressure, steady speed, one pass per joint. Don’t stop and start — overlaps create weak spots.
7. Tool immediately. Spray the bead lightly with your soapy water, then run a wet finger (or a caulk finishing tool) along it in one smooth pass. This presses caulk into the joint and creates the concave profile that sheds water. One pass — reworking silicone tears it.
8. Pull tape immediately. Don’t wait. Pull tape at a sharp angle away from the joint while caulk is wet.
9. Cure 24–48 hours. No water contact during cure. Tape a “DO NOT USE” sign on the tub if you share the house — someone will forget otherwise.
Silicone vs. Everything Else
For tubs, it’s silicone or nothing. Acrylic latex caulk (even “kitchen and bath” labeled) shrinks as it cures, creating micro-gaps that water infiltrates. “Siliconized” acrylic is a compromise product — better than plain acrylic, nowhere near pure silicone. Pure silicone stays flexible for years, resists mold (get the mildewcide version), and handles the constant wet/dry, hot/cold cycling of a tub surround. The properties of silicone sealants explain why nothing else matches it for wet-area longevity.
The trade-off: silicone can’t be painted, and it’s harder to remove later. Both are acceptable prices for caulk that lasts 5–10 years instead of 6 months.
Maintenance: Making It Last Even Longer
- Ventilate. Run the bath fan during and 20 minutes after every shower. Moisture is caulk’s enemy #1.
- Squeegee the tub surround after use — 30 seconds that dramatically reduces mold pressure.
- Clean with non-abrasive cleaners. Harsh scrubbing and bleach damage silicone over time. Mild cleaners preserve it.
- Inspect yearly. Catch a small separation early, and you can often do a spot repair instead of a full re-caulk.
How Often Should You Recaulk?
Even perfect silicone caulk doesn’t last forever. In a daily-use shower or tub, expect 5–10 years from quality 100% silicone; acrylic caulks last 2–5 years (another reason to use silicone). Inspect annually: look for separation from the tub or tile, cracks, discoloration that won’t clean, or soft spots. Catching failure early means a simple re-caulk; ignoring it means water migrating behind the tub surround, where it rots framing and grows mold you can’t see. If you’re recaulking every year or two, something’s wrong — usually the tub wasn’t filled during application, the old caulk wasn’t fully removed, or there’s excessive movement.
Caulk vs. Grout: Know the Difference
A common bathroom mistake: grouting where caulk belongs. Grout is for tile-to-tile joints on stable surfaces. Caulk is for any joint involving two different materials or any movement — tub-to-tile, tile-to-wall corners, countertop-to-backsplash. Grout in a tub-to-tile joint cracks within months because the tub flexes; caulk flexes with it. If your bathroom has cracked grout along the tub line, the fix isn’t more grout — it’s removing it and caulking properly. Every time.
The Takeaway
How do you caulk a bathtub so it actually lasts? Remove every trace of old caulk, clean and dry obsessively, use 100% silicone, fill the tub with water first, tape your lines, apply one smooth bead, tool once, and let it cure fully. The tub-full-of-water trick and the complete old-caulk removal are the two things that separate 6-month caulk from 6-year caulk.
It’s a $15, two-hour project that prevents water damage worth thousands. Few DIY jobs have a better return. Bathroom projects continuing? Our permanent mold removal guide and grout cleaning guide are the natural next steps.