
What Is the Simplest Way to Start Composting at Home?
What is the simplest way to start composting at home? Composting sounds like something that requires a big backyard, a special bin, and a tolerance for weird smells. It doesn’t. The simplest start is a small countertop container and a drop-off point — no yard, no worms (unless you want them), no smell. I’ve composted in apartments for years, and the whole setup takes 15 minutes and about $20.
Here’s why it’s worth it and exactly how to start this week.
Why Bother Composting?
Food scraps in landfills don’t just disappear — they decompose without oxygen and produce methane, a greenhouse gas far more potent than CO2. Composting keeps that waste out of landfills and turns it into something useful. But the practical reasons are just as compelling:
- Less trash. Food scraps are roughly 30% of household waste. Composting can cut your trash nearly in third — fewer bags, fewer trips to the curb.
- Less smell. Counterintuitive, but true: the stuff that makes trash stink is rotting food. Remove it and your trash barely smells.
- Free fertilizer. If you garden (even houseplants), finished compost is black gold.
- It’s easy. Genuinely. Easier than recycling, which has actual rules.
What Can You Compost? (The Short List)
Yes: fruit and vegetable scraps, coffee grounds and filters, tea bags (remove staples), eggshells, bread, rice, pasta, nutshells, yard trimmings, leaves, shredded newspaper.
No: meat, dairy, oils, pet waste, charcoal ash, glossy paper, anything labeled “biodegradable plastic” (most doesn’t actually break down in home systems).
The “no meat/dairy” rule is about smell and pests in home systems, not chemistry. When in doubt, leave it out — especially in apartments.
The Simplest Way to Start Composting at Home: Three Methods
Method 1: Countertop bin + drop-off (easiest, apartment-friendly)
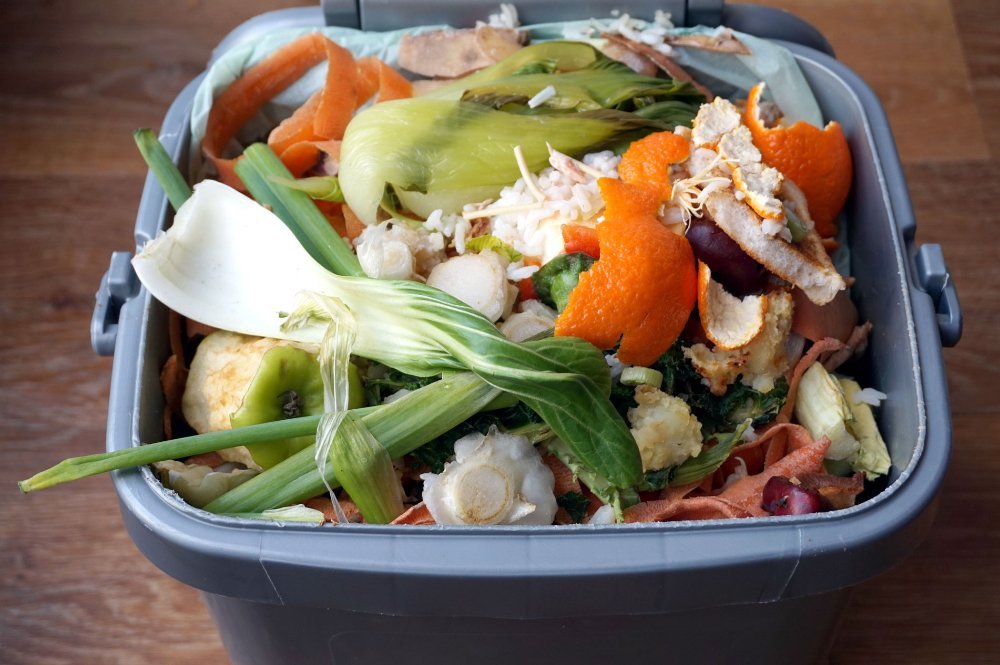
Get a small countertop compost pail with a charcoal filter lid ($15–$25). Toss scraps in during the week. Once or twice a week, empty it at a drop-off point — many cities have curbside organics pickup now, and farmers markets, community gardens, and co-ops often accept scraps for free. Search “[your city] compost drop-off” — you’ll likely find options you didn’t know existed. No smell, no maintenance, no yard.
Method 2: Worm bin / vermicomposting (apartment-friendly, most fun)
A plastic tote with air holes, damp shredded newspaper bedding, and a pound of red wiggler worms. Feed them your scraps; they produce incredible fertilizer (worm castings). It sounds weird, it doesn’t smell when done right, and it fits under a sink. Startup: ~$40 including worms ordered online. Maintenance: 10 minutes a week.
Method 3: Outdoor bin or tumbler (if you have any outdoor space)
A simple enclosed bin or tumbling composter on a patio, balcony, or yard. Layer “greens” (food scraps, coffee grounds) with “browns” (leaves, shredded paper, cardboard) roughly 1:3. Turn occasionally, keep damp like a wrung sponge. Finished compost in 2–6 months depending on method and climate.
Avoiding the Smell (Everyone’s Fear)
Done right, compost doesn’t stink. Smell means something’s off — almost always too many greens and not enough browns, or too much moisture. Fixes:
- Add shredded newspaper, dry leaves, or cardboard whenever you add food scraps.
- Keep the countertop bin’s charcoal filter fresh (replace every few months).
- Empty the countertop bin every 2–3 days in summer.
- Freeze scraps in a bag if drop-off day is far away — zero smell, zero fruit flies.
Fruit flies are the other common complaint. A tight-fitting lid and burying scraps under browns solves 95% of it. A small dish of apple cider vinegar with a drop of soap nearby catches the rest.
Start This Week: The 15-Minute Setup
- Buy or repurpose a container with a lid (even a large yogurt tub works to start).
- Put it where you prep food — if it’s not convenient, you won’t use it.
- Look up your nearest drop-off or curbside option.
- Toss in tonight’s vegetable peels. You’re composting.
That’s genuinely it. You can upgrade to worms or a tumbler later if you catch the bug. If you’re also greening your routine, our guide on cheap hobbies including gardening pairs well — compost feeds gardens beautifully.
What Is the Simplest Way to Start Composting at Home in Winter?
Cold weather raises the obvious question: does composting stop when it freezes? Outdoor piles slow dramatically, but home composting absolutely continues through winter — you just switch methods. Here’s how to keep it going when the temperature drops.
For outdoor composters, winter is about insulation, not activity. A larger pile (at least 3×3×3 feet) retains enough core heat to keep decomposing even in freezing weather — the center stays warm while the outer layer freezes. Insulate with straw bales around the bin, a tarp over the top, and a thick layer of browns (leaves, shredded cardboard) as a blanket. Turn less frequently (monthly instead of weekly) to preserve heat. The pile won’t finish much in January, but it won’t die either — and come spring thaw, it’ll roar back to life with months of banked material.
Keep collecting through winter regardless. This is the key habit: the kitchen scraps don’t stop, so the collection shouldn’t either. If your outdoor pile is frozen solid, stockpile browns and layer scraps in — they’ll freeze in place and start breaking down at the first thaw. Freezing actually helps by bursting cell walls, so spring decomposition starts faster. Think of winter as cold storage, not a shutdown.
For apartment composters, winter changes nothing — and that’s the beauty of indoor methods. Worm bins, bokashi systems, and countertop-plus-dropoff all work identically year-round since they’re indoors. If anything, winter is the best time to start vermicomposting: you’re inside more, the bin needs the same 10 minutes a week, and by spring you’ll have finished castings ready for planting season. Your houseplants will thank you — worm castings are the best indoor plant fertilizer that exists, and winter is when indoor plants need feeding the least, so you’ll have a stockpile ready for the spring growth spurt.
Bokashi deserves special mention for winter: it’s an indoor fermentation method (no smells, no pests) that pickles scraps in a sealed bucket, and the fermented output can be buried or added to an outdoor pile whenever convenient — even frozen ground accepts it in a shallow trench that thaws by spring. It’s the ultimate cold-climate apartment method.
The winter mindset shift: composting isn’t a fair-weather hobby. The waste stream is year-round, the methods adapt, and spring-you will be grateful that winter-you kept the system running. A frozen pile in January becomes black gold by May — but only if you kept feeding it.
The Bottom Line
Starting composting at home is one of those things that seems complicated until you do it, then seems obvious. Container, scraps, drop-off. Fifteen minutes, twenty bucks, less trash, less smell, and you’re keeping methane out of the atmosphere. There’s no reason to wait for the perfect system — start with the yogurt tub and upgrade later.
For authoritative guidance, the EPA’s home composting guide covers the science and methods, and Wikipedia’s compost article goes deep on the biology for the curious.